How do you create a 3D object from a 2D drawing?
Perspective in relief carving is the technique of creating the illusion of depth.
In this video Randy 'Madcarver' Stoner explains the basics of how perspective works in relief carving by looking at a few of his past beginner carving projects. Next, learn some tips on where to find inspiration for your next project design, and what to look for in a beginner project.
Video Notes:
Timestamp [0:52]
Rose Carving - Straight On View
- Look at the points that create depth in your design (shadow, or something behind something else, for instance)
- Create depth and force perspective by cutting away more material and pushing certain petals behind others

Timestamp [2:24]
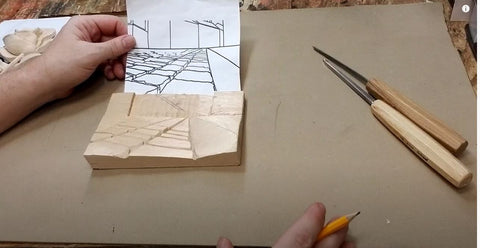
City Street Carving- Worms-eye View
- Perspective is just how someone sees something
- Play with changing size to create illusion
- You can cut very little wood to create that illusion of depth

Timestamp [3:55]
Stone Archway Carving - Lateral View From Right to Left
- Use angles to create lateral perspective
- In this example, the right side of the archway is raised and lower than the left to create the illusion that it is closer to you
- Think about what will be fun to carve!

Timestamp [5:54]
"Tomes" Stacked Books Carving - Shadow
- Create shadow for added depth
- Forced perspective manipulates human perception through scaled objects (like the books and the bookshelf in this carving)
- Think about where the viewer is "viewing" from

Timestamp [7:32]
Design Creation
- Carve things that grab your interest
- A good beginner projects will help you learn techniques like perspective, forced perspective and texturing
- If you don't want to create your own design, good places to search for inspiration are royalty free clipart online, or children's coloring books.
Timestamp [9:30]
Perspective - One Last Tip
- To create really nice perspective, have one main subject in the foreground, and many lesser subjects in the background (Rose with petals, Stacked books with shelves, etc...)

Leave a comment